Automatic Traffic Check-in Script
- Google Apps Script / Cloud Functions
- Google Apps Script
- Cloud Function (Tencent Cloud)
note
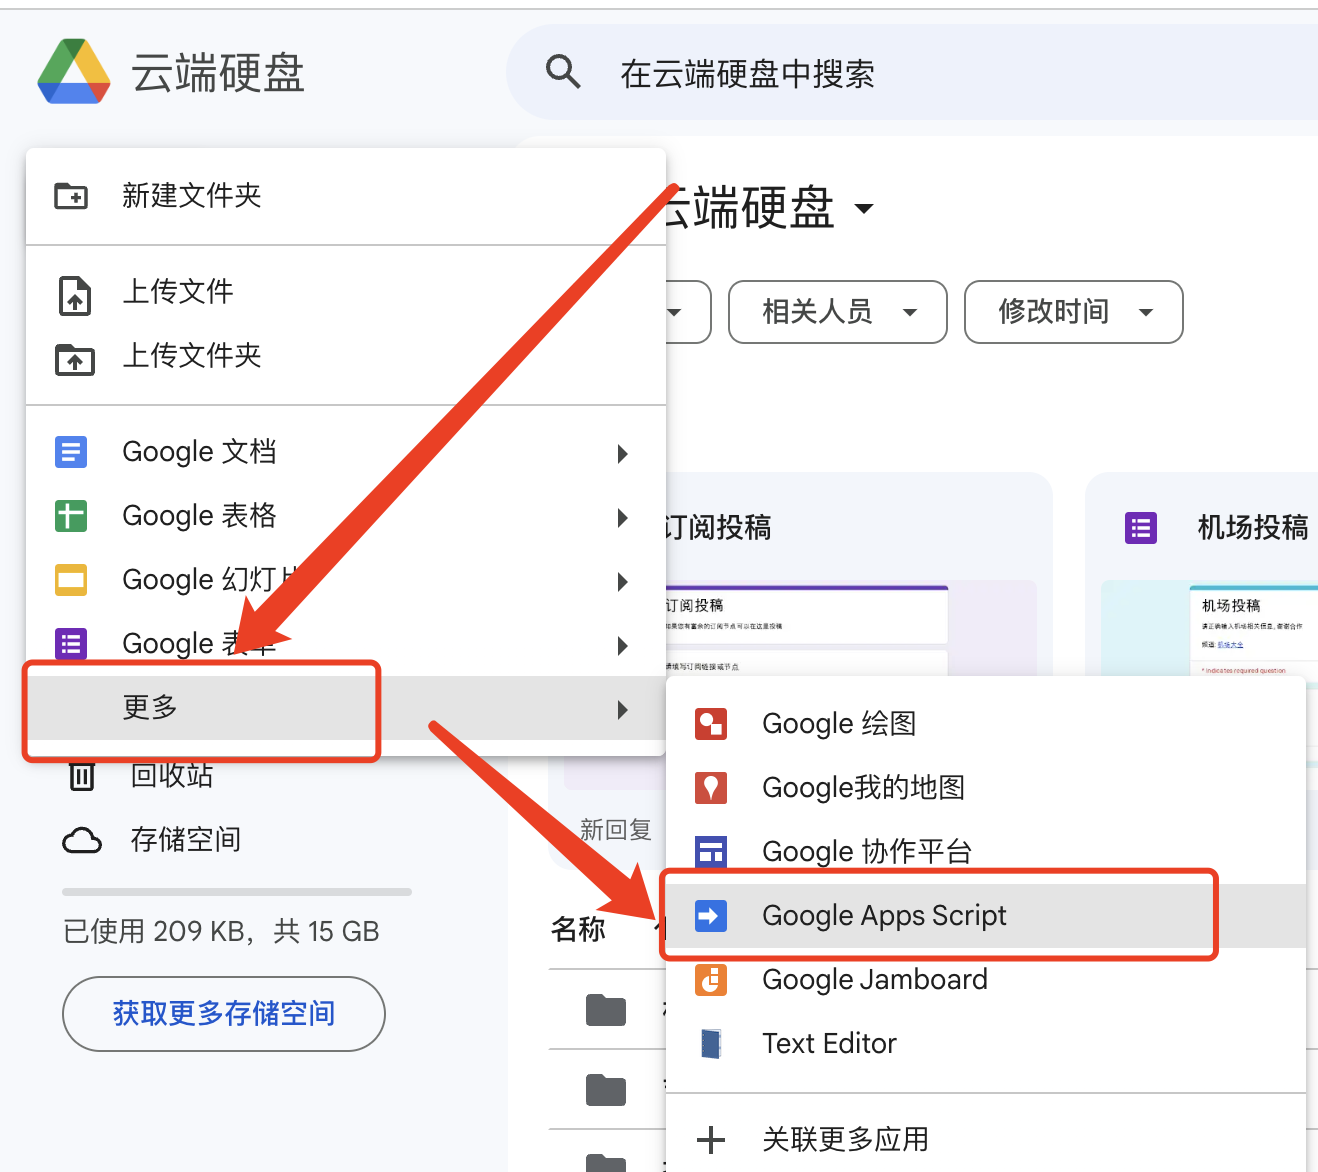
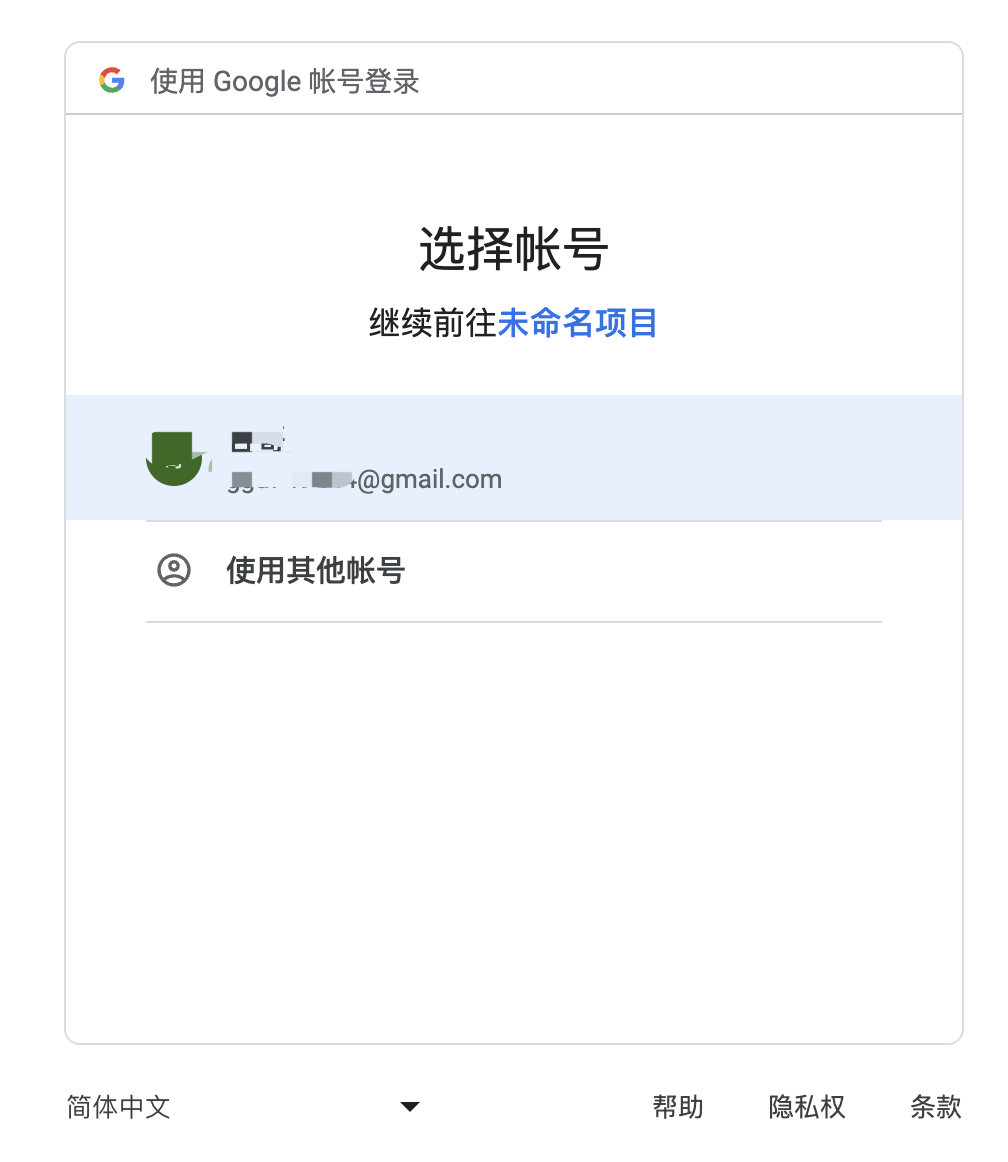
- A Google account is required. Create a Google Apps Script in Google Drive.
Getting Started
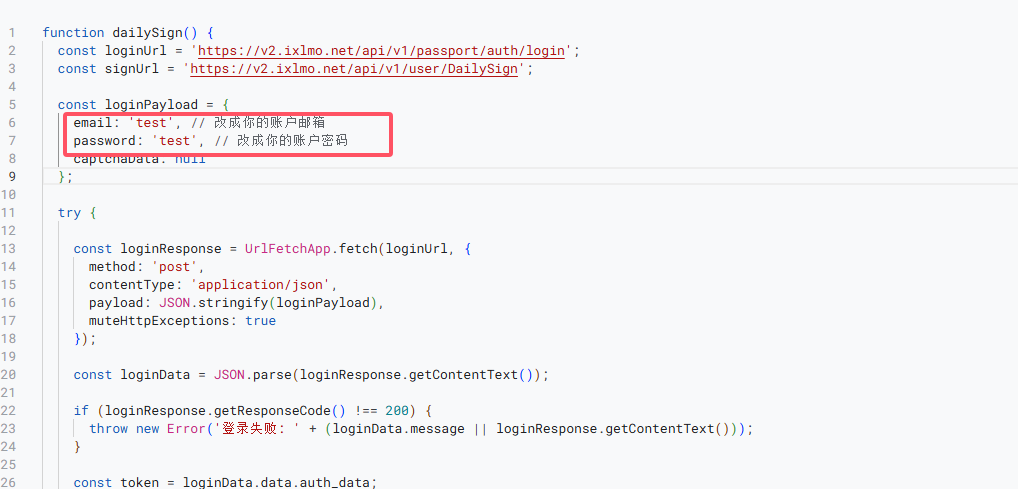
 Paste the following script code here
Click to expand code
  function dailySign() {
  const loginUrl = 'https://v2.ixlmo.net/api/v1/passport/auth/login';
  const signUrl = 'https://v2.ixlmo.net/api/v1/user/DailySign';

  const loginPayload = {
    email: 'test', // Replace with your account email
    password: 'test', // Replace with your account password
    captchaData: null
  };

  try {

    const loginResponse = UrlFetchApp.fetch(loginUrl, {
      method: 'post',
      contentType: 'application/json',
      payload: JSON.stringify(loginPayload),
      muteHttpExceptions: true
    });

    const loginData = JSON.parse(loginResponse.getContentText());

    if (loginResponse.getResponseCode() !== 200) {
      throw new Error('登录失败: ' + (loginData.message || loginResponse.getContentText()));
    }

    const token = loginData.data.auth_data;


    const signResponse = UrlFetchApp.fetch(signUrl, {
      method: 'get',
      headers: {
        'Authorization': token
      },
      muteHttpExceptions: true
    });

    const signData = JSON.parse(signResponse.getContentText());

    if (signResponse.getResponseCode() !== 200) {
      throw new Error('签到失败: ' + (signData.message || signResponse.getContentText()));
    }

    Logger.log('签到成功:' + signData.message);
  } catch (e) {
    Logger.log('错误: ' + e.message);
  }
}
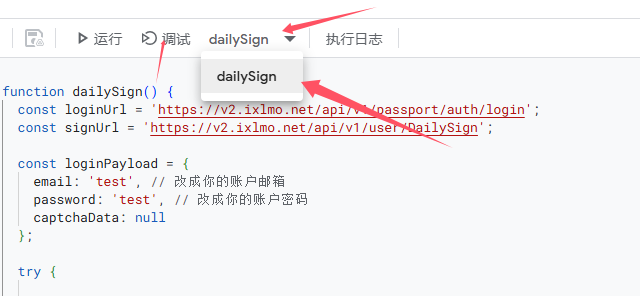
Fill in the Relevant Fields
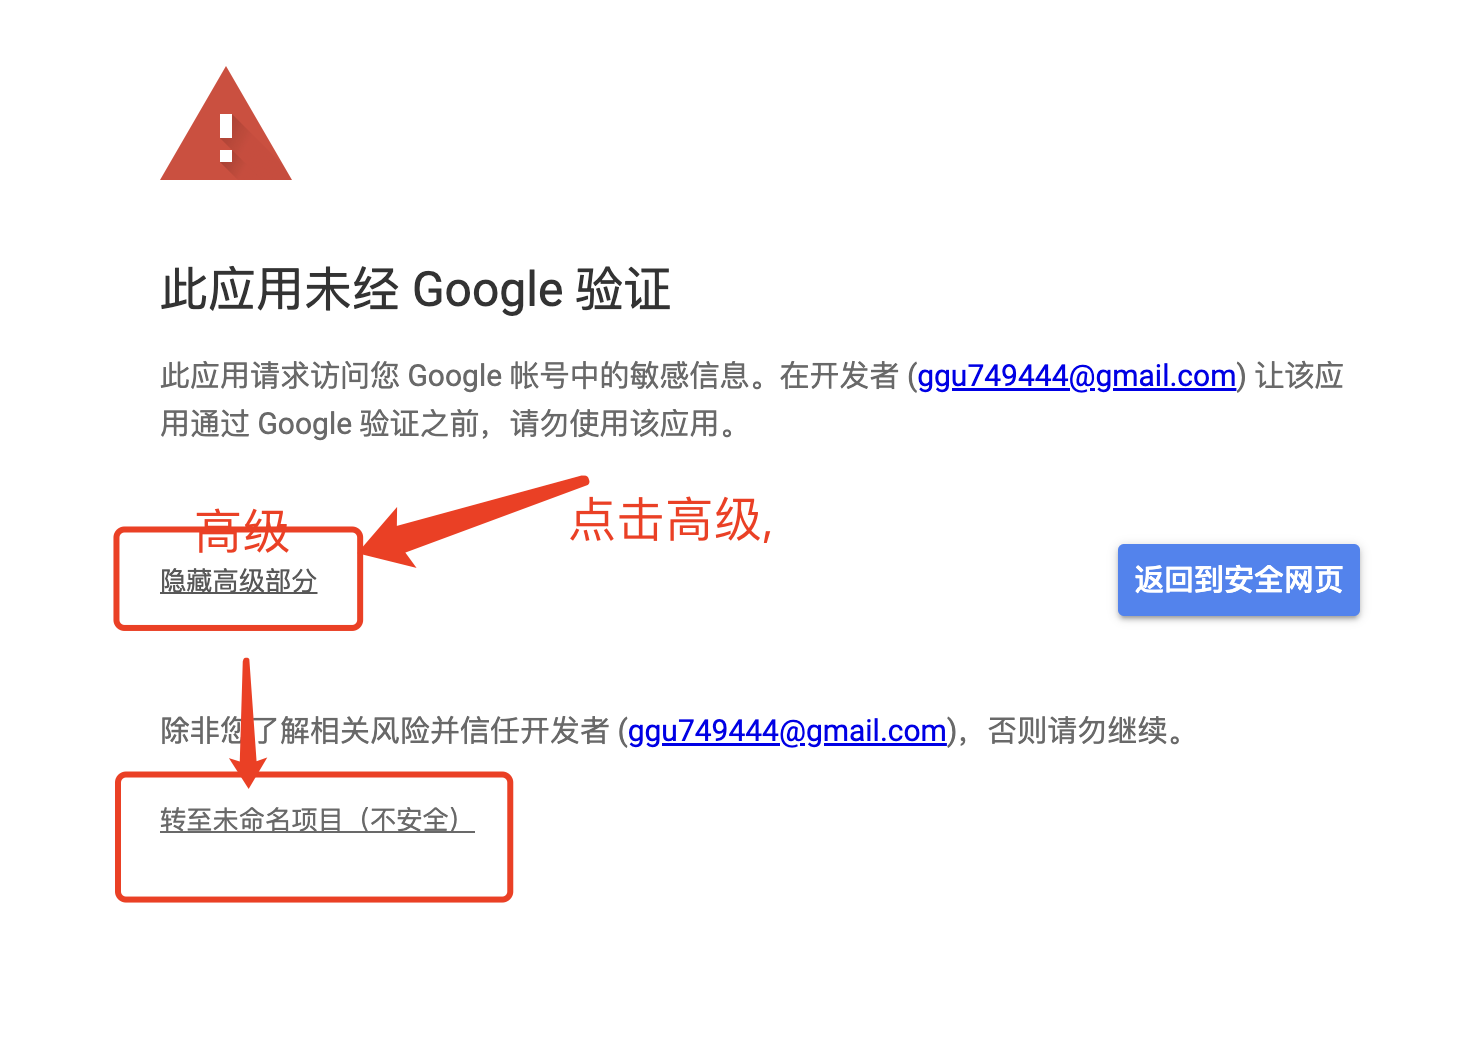
The basic configuration is now complete. To run the script, click Debug, select dailySign from the dropdown, click Debug, and authorize website access.
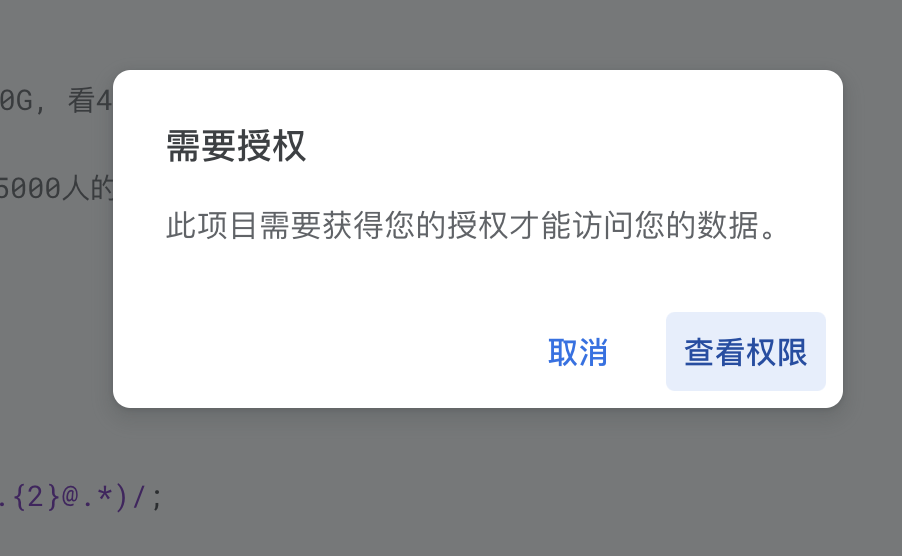
Click to review permissions:
The project should now be running, and you can see execution logs in the debug console:

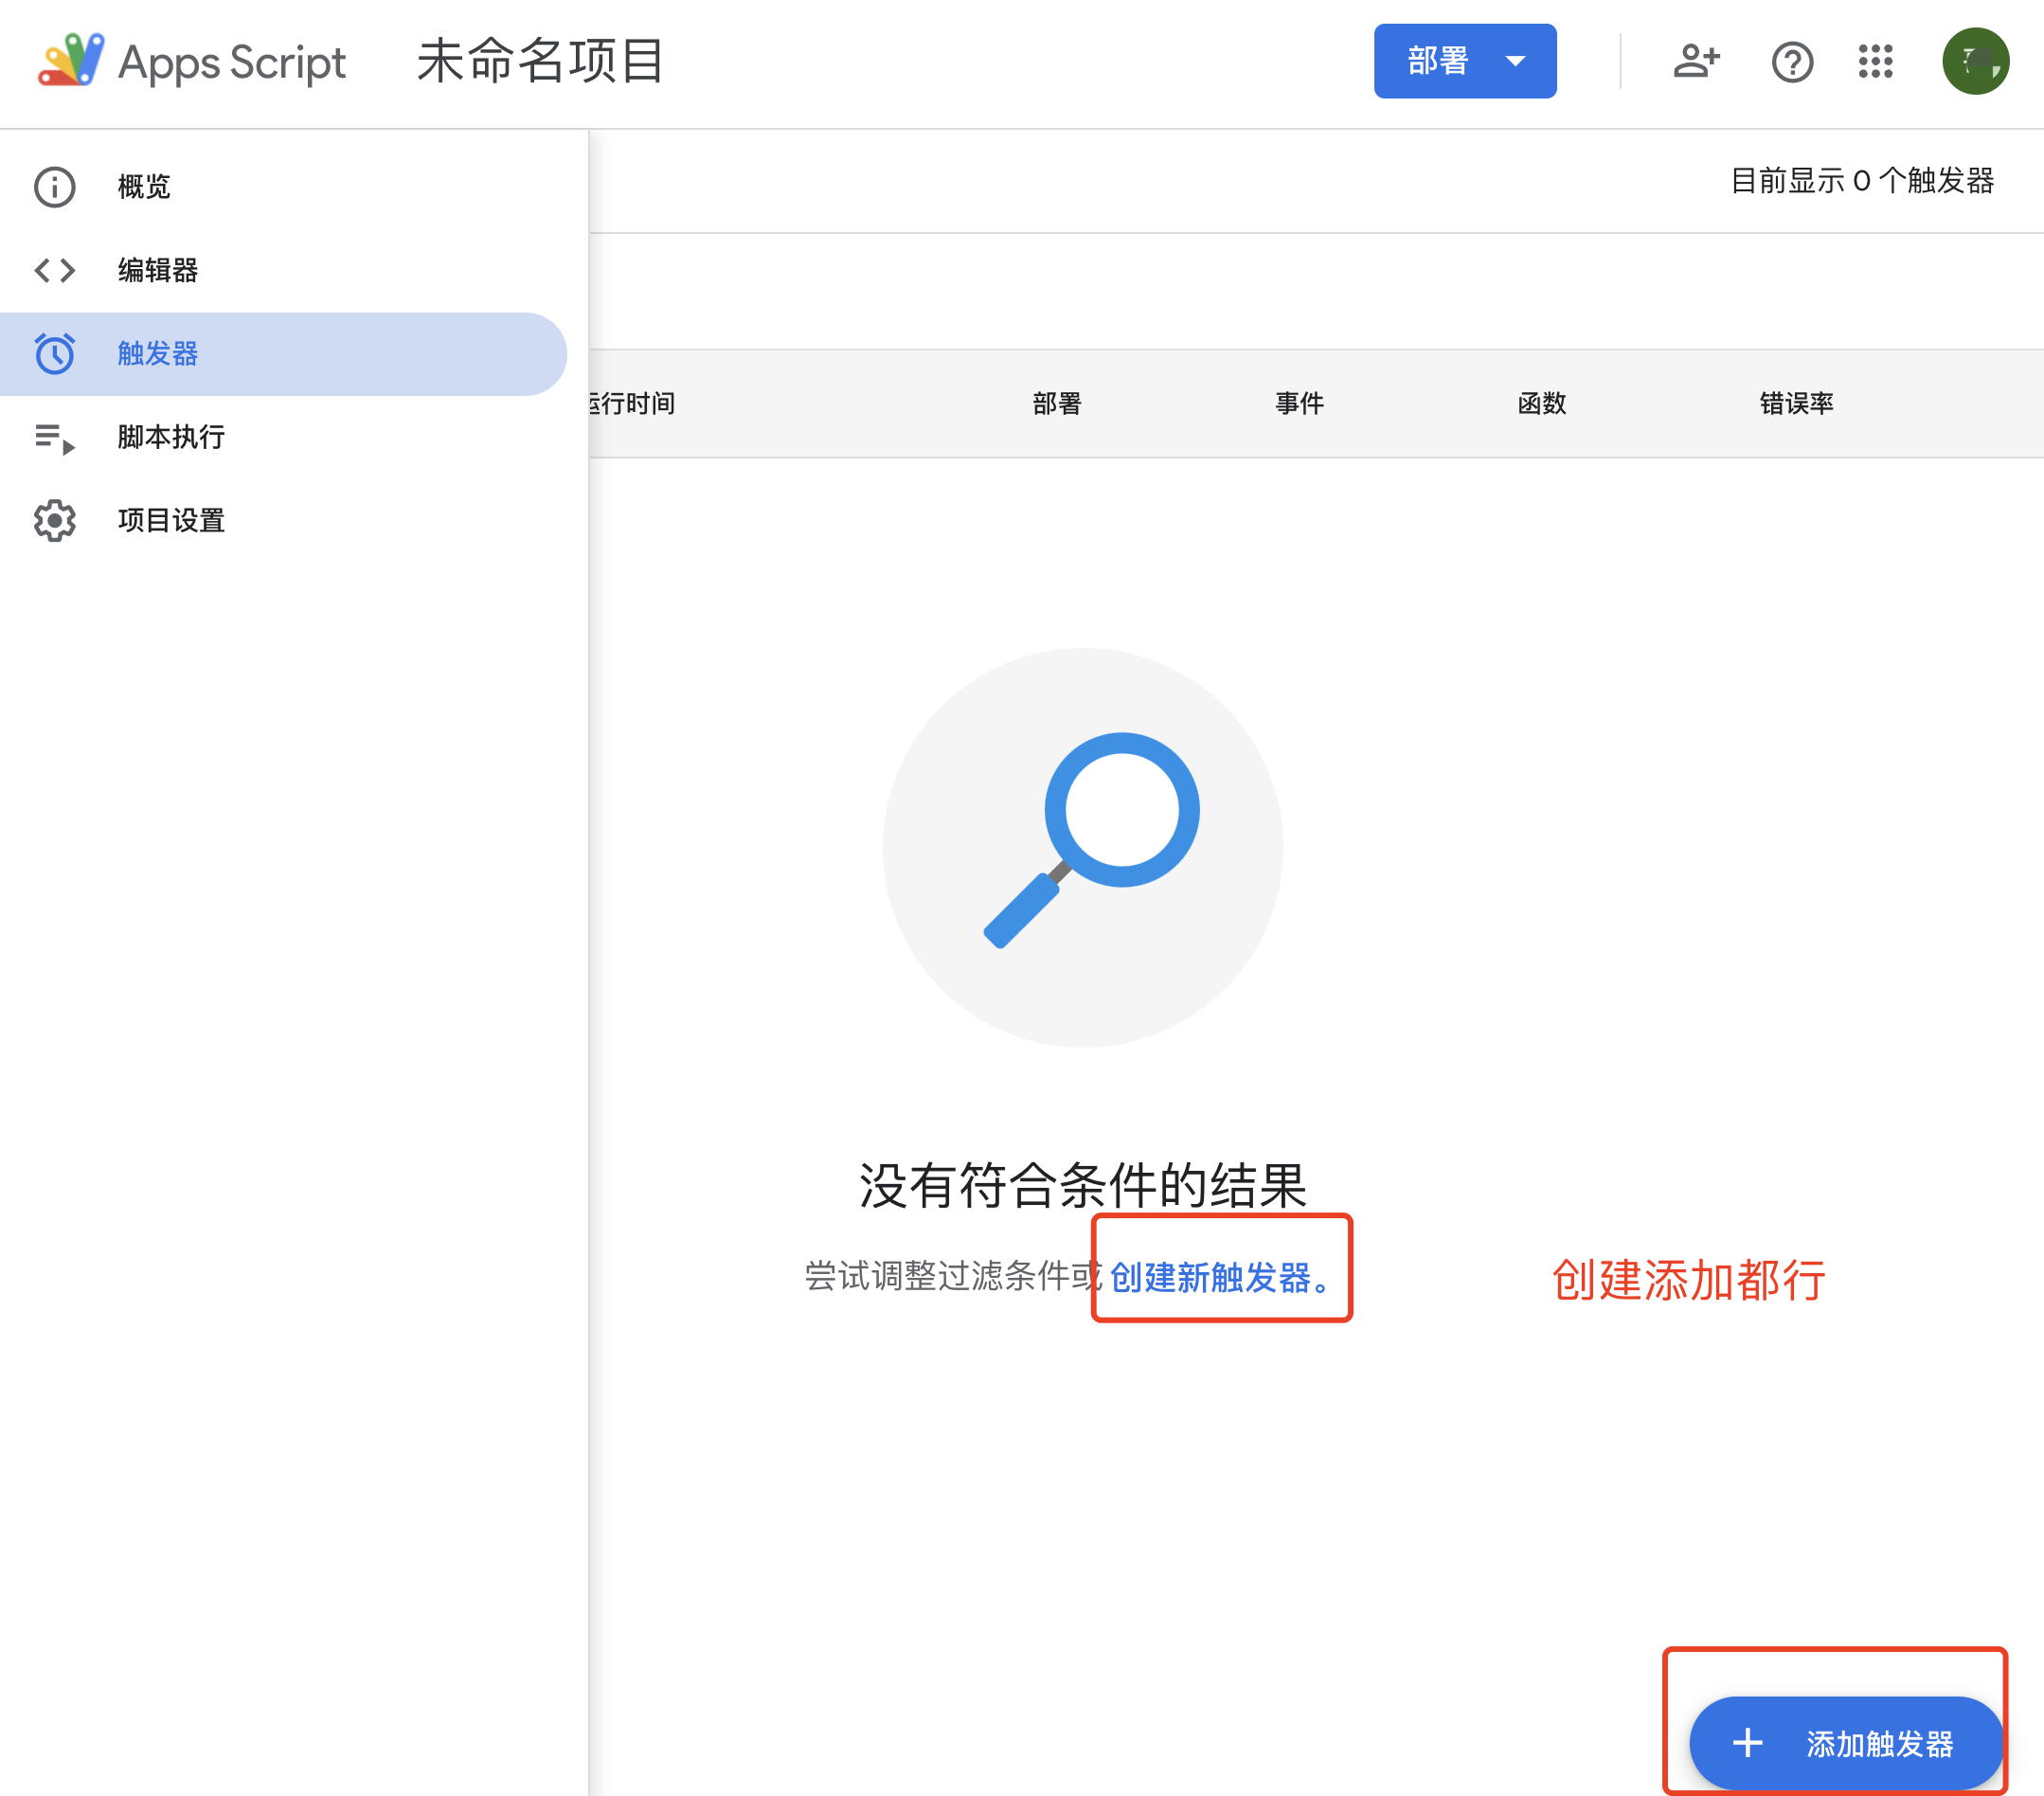
Deployment
Google Apps Script does not require deployment; here we need to add a time-driven trigger:
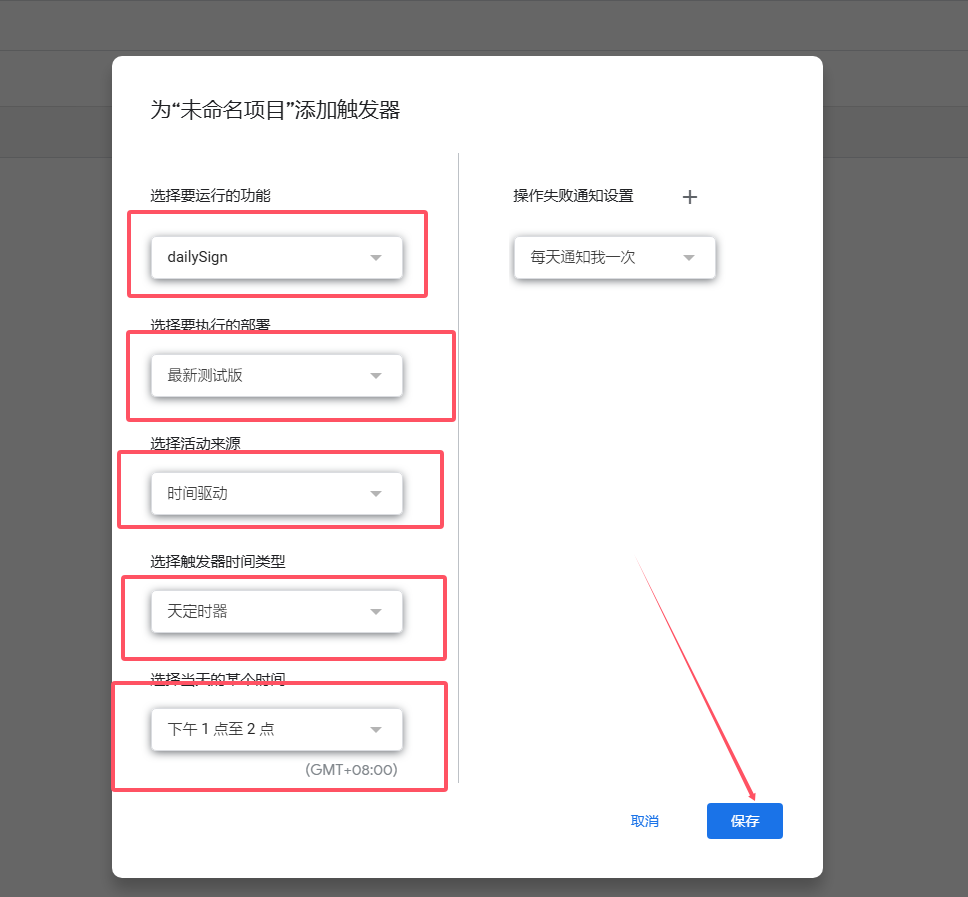
- Function to run:
dailySign - Event source: Time-driven
- Type of time-based trigger: Daily timer
- Time interval: Between 1 PM and 2 PM
Done!
note
- 一个腾讯云账户
- 云函数 SCF
Getting Started
-
Runtime environment: Node.js 16.13
-
Function type: Event Function
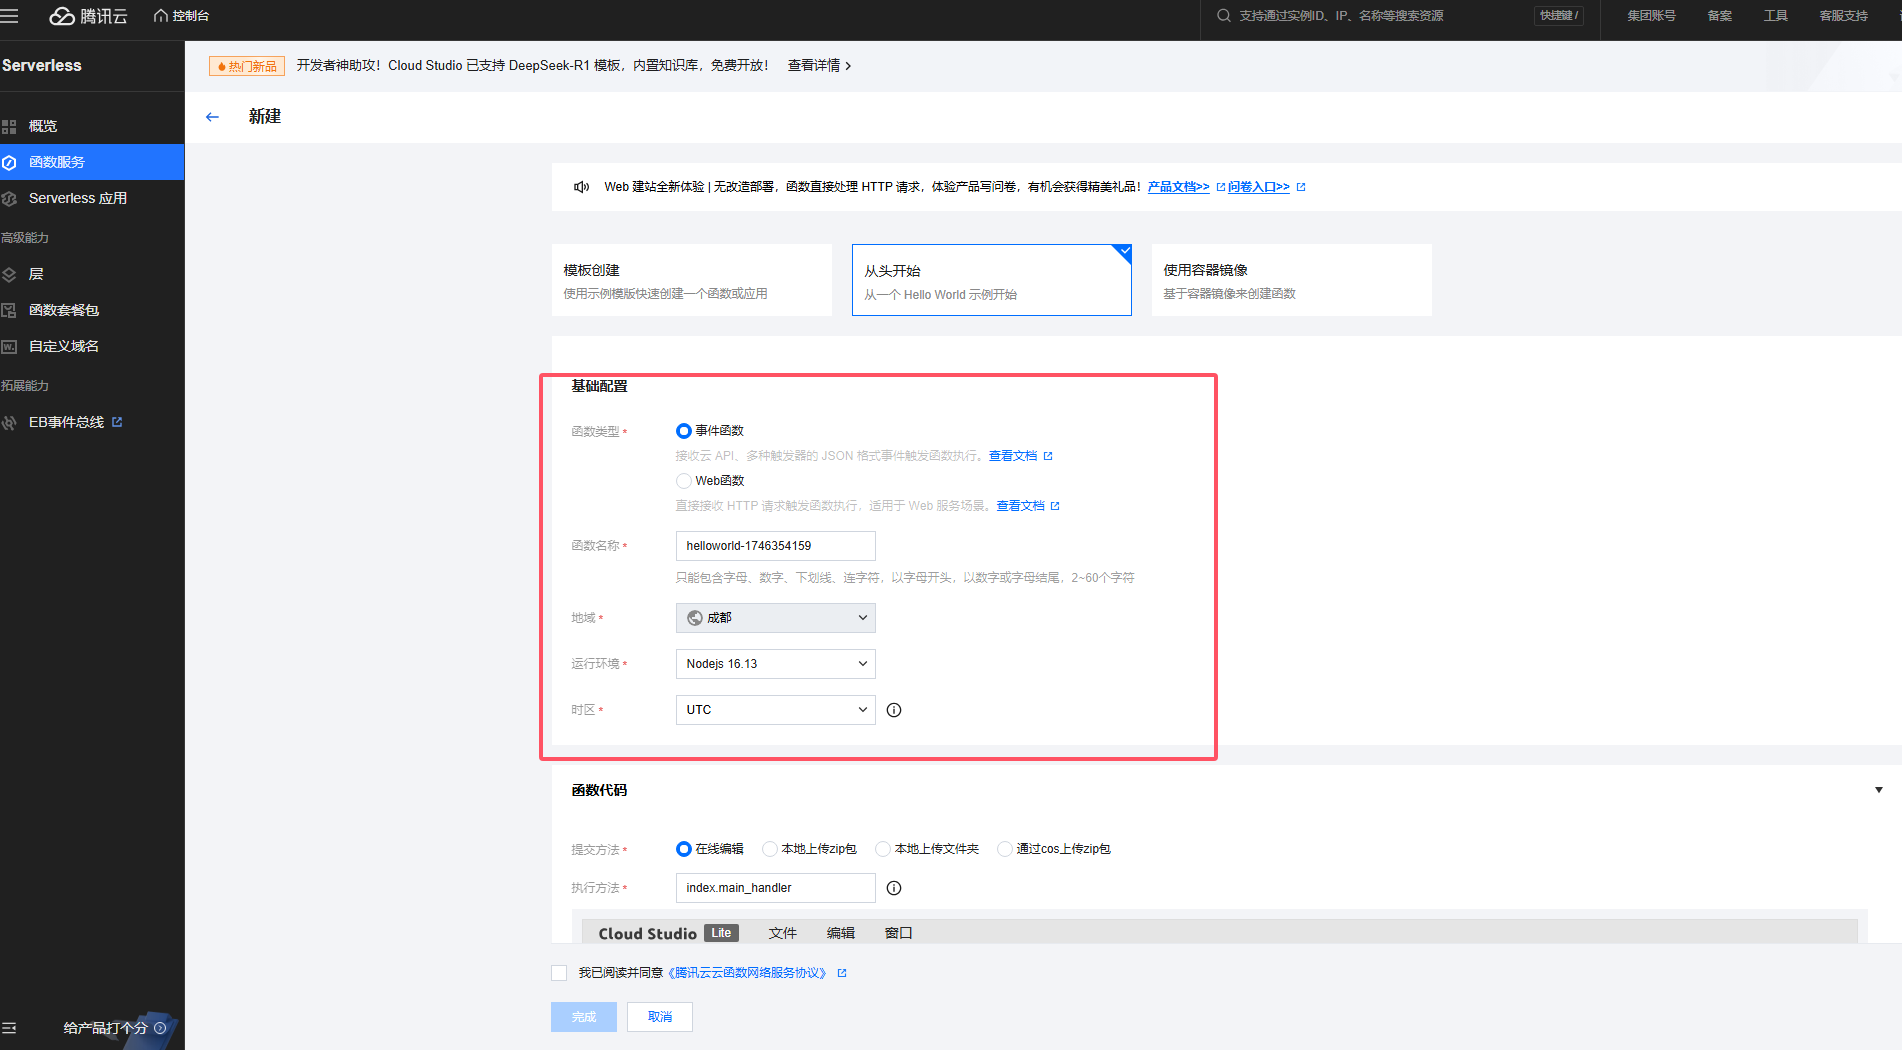
-
Execution method: index.main_handler
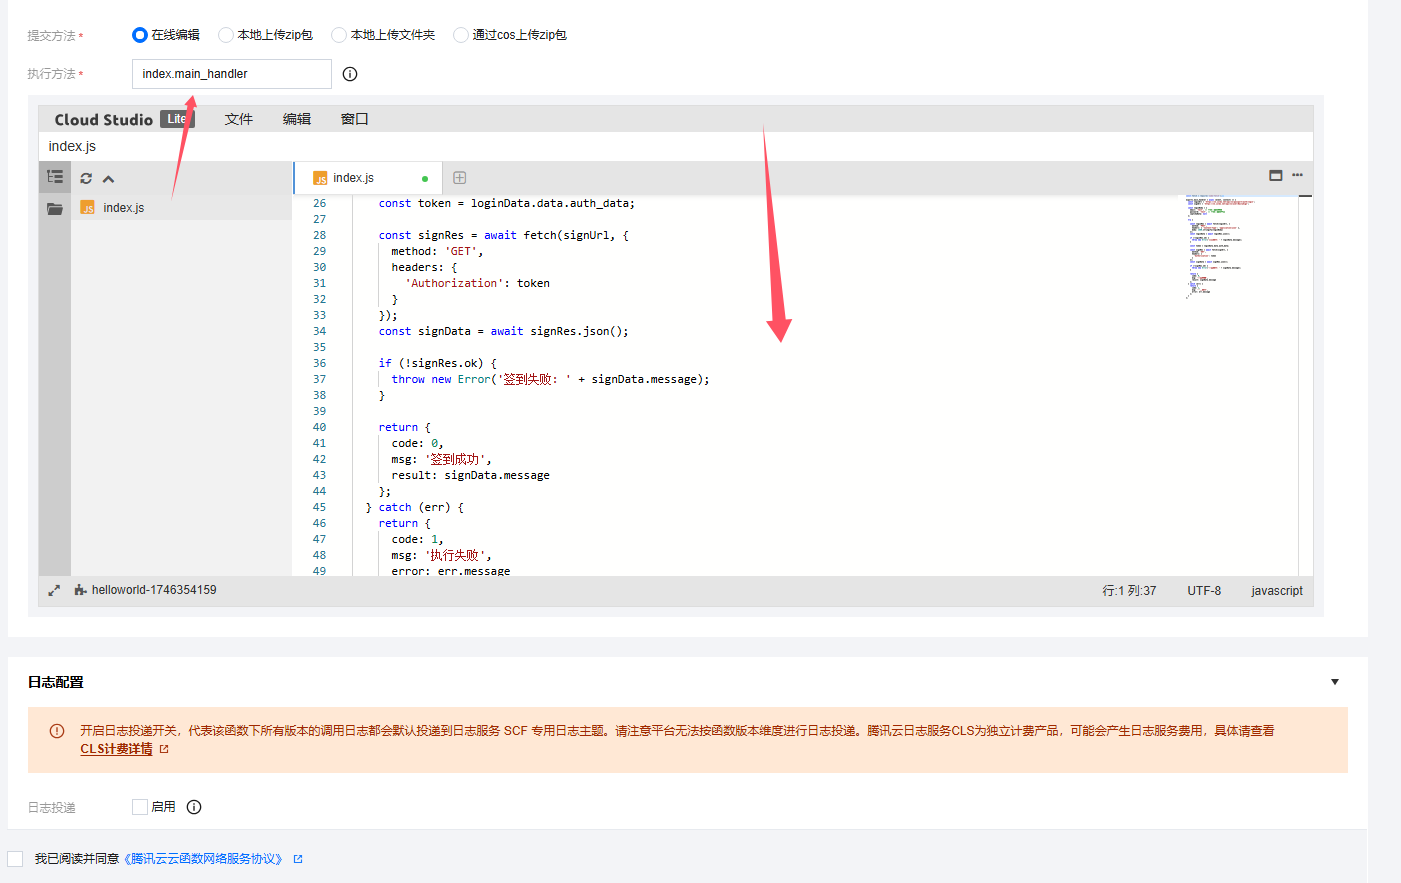
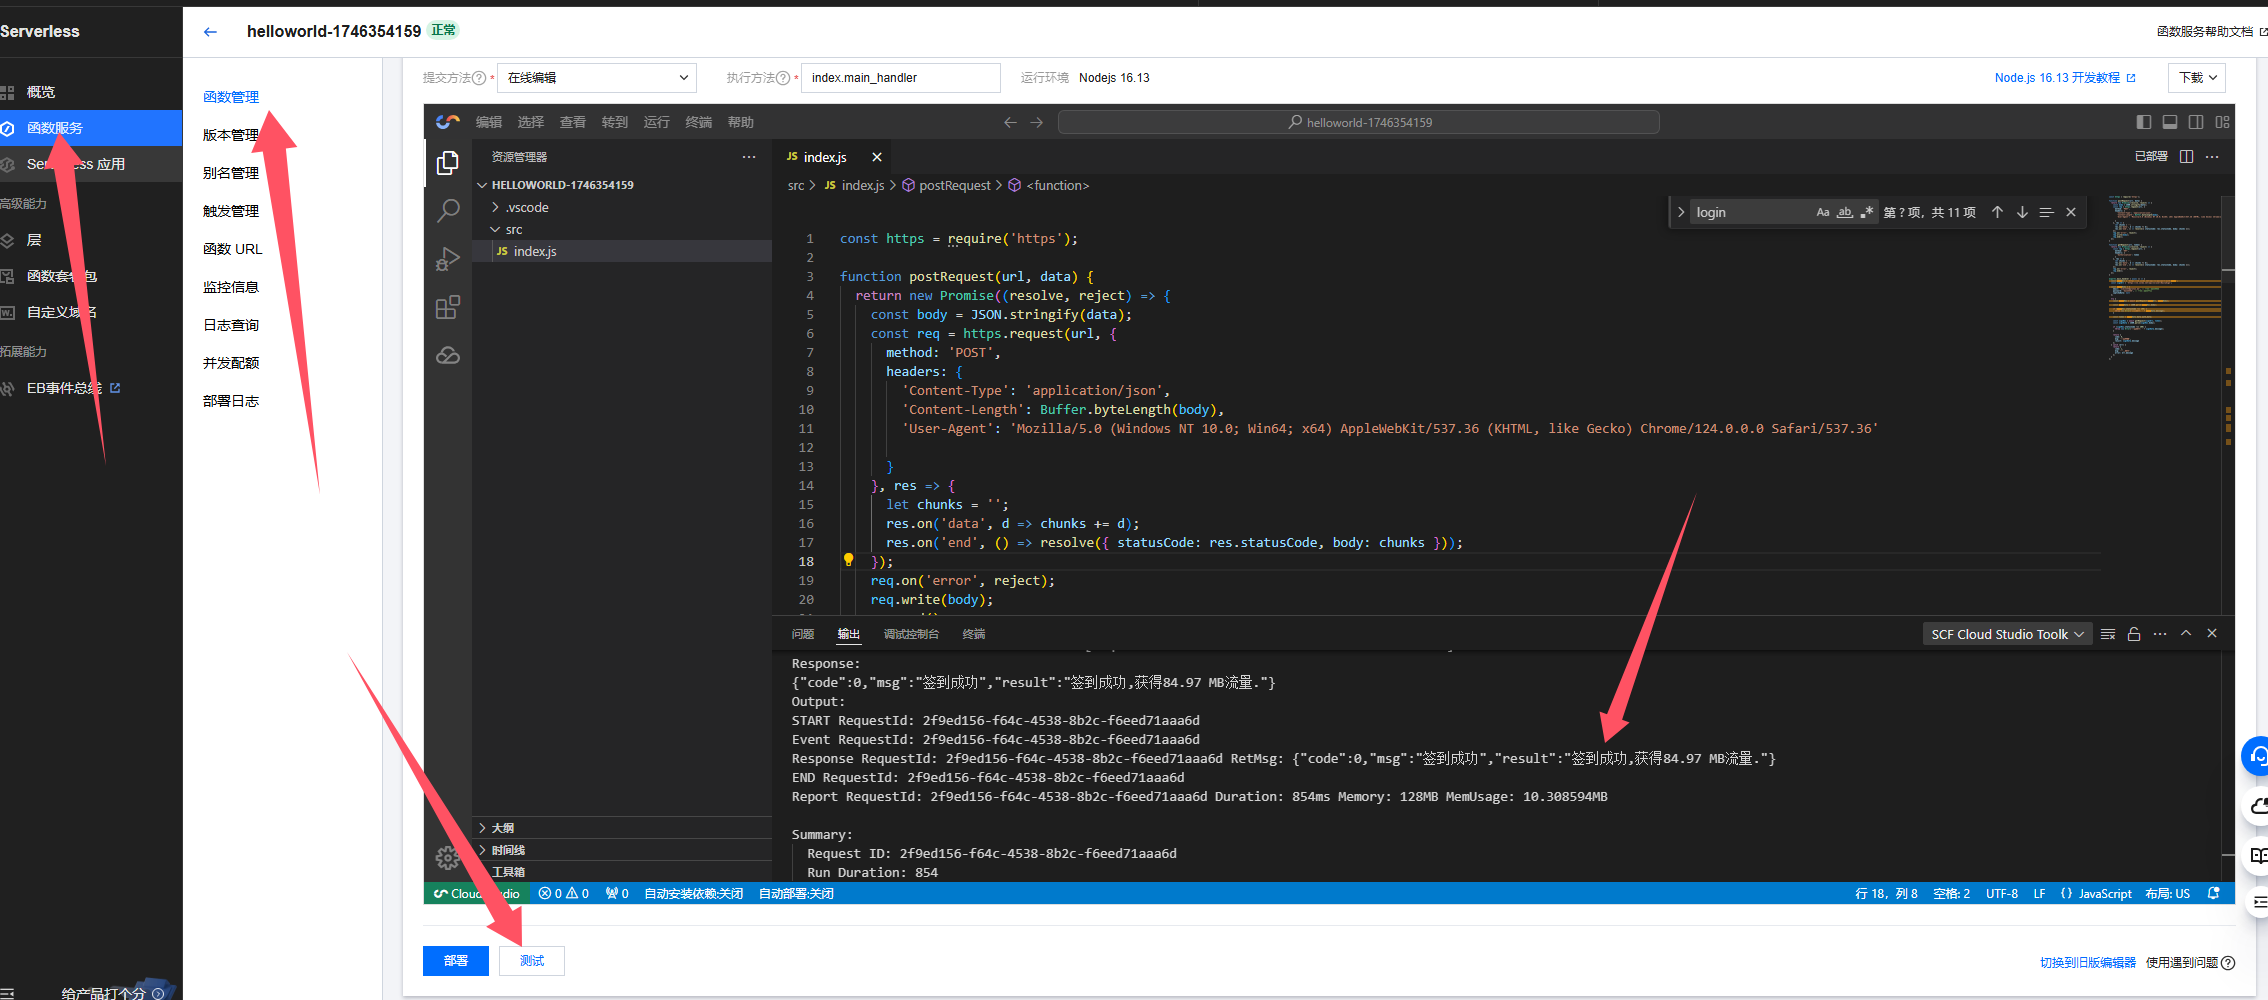
Paste the following script code:
Click to expand code
const https = require('https');
function postRequest(url, data) {
return new Promise((resolve, reject) => {
const body = JSON.stringify(data);
const req = https.request(url, {
method: 'POST',
headers: {
'Content-Type': 'application/json',
'Content-Length': Buffer.byteLength(body),
'User-Agent': 'Mozilla/5.0 (Windows NT 10.0; Win64; x64) AppleWebKit/537.36 (KHTML, like Gecko) Chrome/124.0.0.0 Safari/537.36'
}
}, res => {
let chunks = '';
res.on('data', d => chunks += d);
res.on('end', () => resolve({ statusCode: res.statusCode, body: chunks }));
});
req.on('error', reject);
req.write(body);
req.end();
});
}
function getRequest(url, token) {
return new Promise((resolve, reject) => {
const req = https.request(url, {
method: 'GET',
headers: {
'Authorization': token
}
}, res => {
let chunks = '';
res.on('data', d => chunks += d);
res.on('end', () => resolve({ statusCode: res.statusCode, body: chunks }));
});
req.on('error', reject);
req.end();
});
}
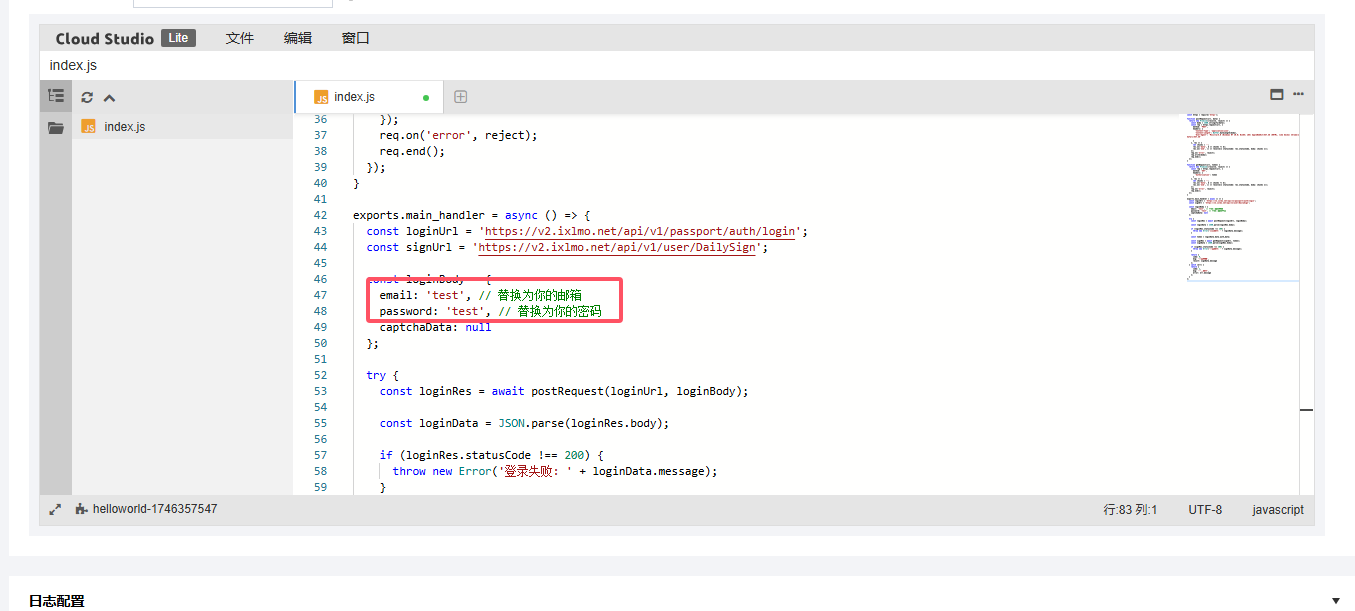
exports.main_handler = async () => {
const loginUrl = 'https://v2.ixlmo.net/api/v1/passport/auth/login';
const signUrl = 'https://v2.ixlmo.net/api/v1/user/DailySign';
const loginBody = {
email: 'test', // Replace with your email
password: 'test', // Replace with your password
captchaData: null
};
try {
const loginRes = await postRequest(loginUrl, loginBody);
const loginData = JSON.parse(loginRes.body);
if (loginRes.statusCode !== 200) {
throw new Error('登录失败: ' + loginData.message);
}
const token = loginData.data.auth_data;
const signRes = await getRequest(signUrl, token);
const signData = JSON.parse(signRes.body);
if (signRes.statusCode !== 200) {
throw new Error('签到失败: ' + signData.message);
}
return {
code: 0,
msg: '签到成功',
result: signData.message
};
} catch (err) {
return {
code: 1,
msg: '执行失败',
error: err.message
};
}
};
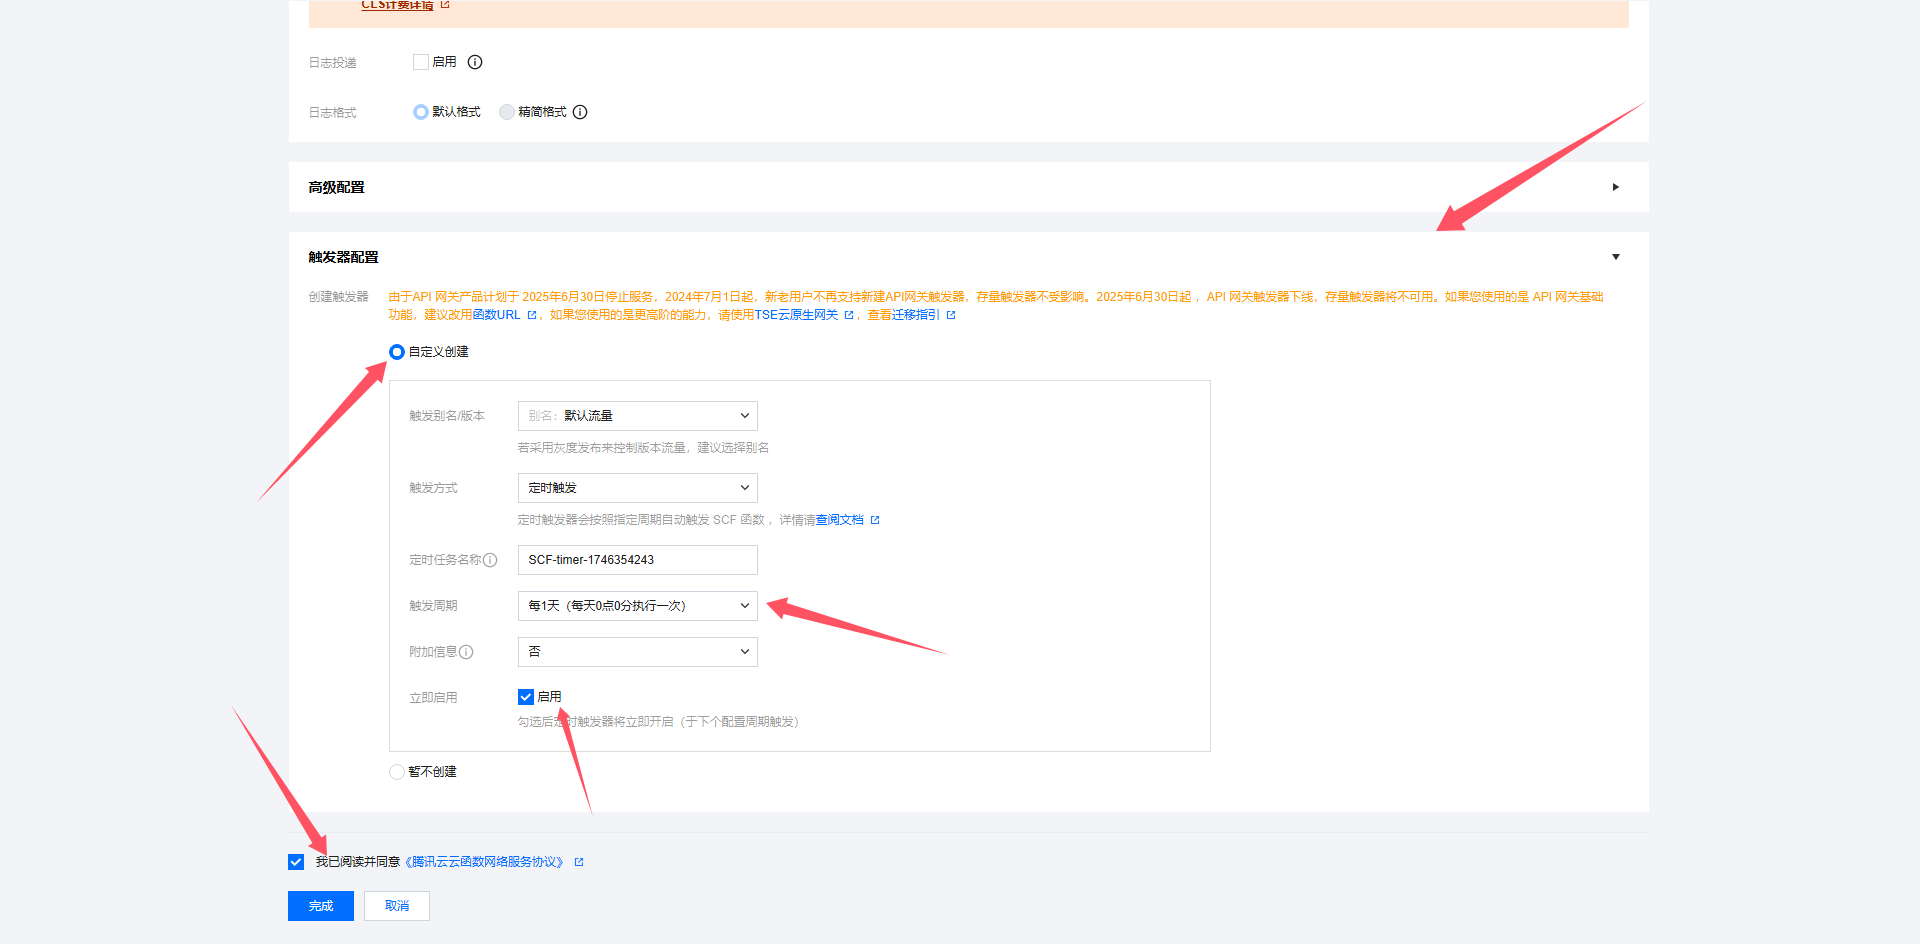
Fill in the Relevant Fields
- Trigger alias: Version: Default Traffic
- Trigger method: Scheduled trigger
- Trigger cycle: Every 1 day (00:00)
- Enable immediately: Yes
- Leave other settings as default
The basic configuration is now complete:
Done!